.png?height=120&name=Verbit%20go%20logo%20(1).png)
Find out how to upload and check out files for transcription as a business account user.
This article is for business account users. Pay as you go customers, please click here.
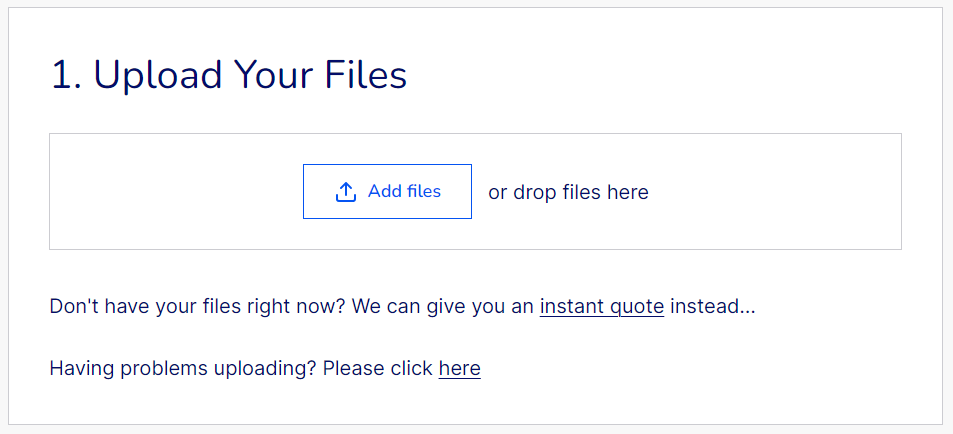
Click on 'Upload a File' in the menu when you are logged in, or on this link. This will take you to the upload page.
1. Click 'add files' and choose which files you want to upload for transcription. You can upload multiple files at once, or add them one by one.
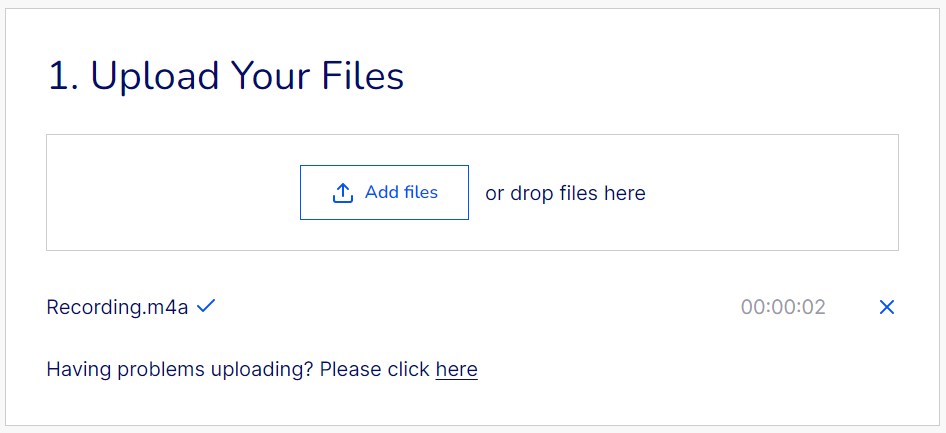
You will see a blue bar for each file to show the progress of the upload. Once all files are uploaded, you'll see a duration instead of the progress bar.
2. Choose your service options
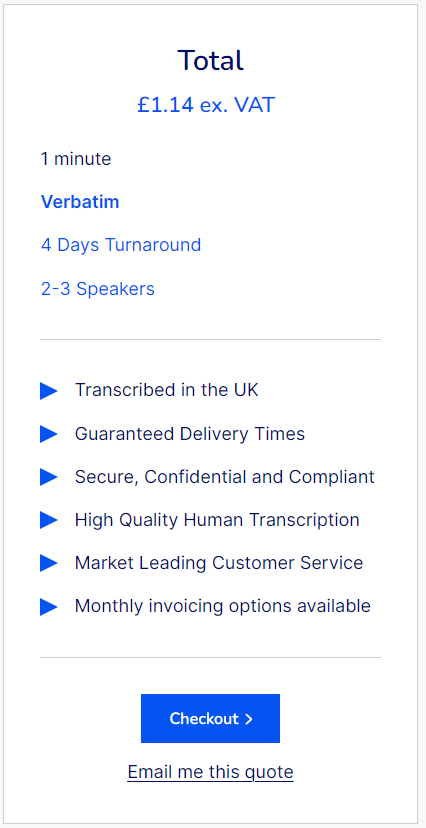
Select your service type (Intelligent Verbatim, Verbatim, Captions and Subtitles or Minutes). This will bring up a list of additional options. Turnaround and number of speakers are mandatory. Once these are selected and your files are fully uploaded, you will see your price on the right-hand side of the page.
You can try changing your service options to see how this affects the price, to find the right balance for your needs and your budget.
3. Add comments (optional)
Add any speaker names, terminology or brand names here, and we'll pass them on to your transcriber. If your recordings contain potentially distressing or upsetting content, please let us know here so that we can provide adequate warning to our transcription team.
4. Head to Checkout
Once your files are fully uploaded and you've selected your services, you'll see a summary, price and a Checkout button on the right-hand side of the screen, or on the banner at the bottom of the page. Click 'Checkout' to choose your project and complete your order. You can also click 'Email me this quote' to send a PDF of this quote to yourself or a colleague.
5. Choose or create a project
If you have any existing, open projects you will be able to select these from the dropdown menu. Once a project is selected, the Checkout button will become active, and you can complete your order.
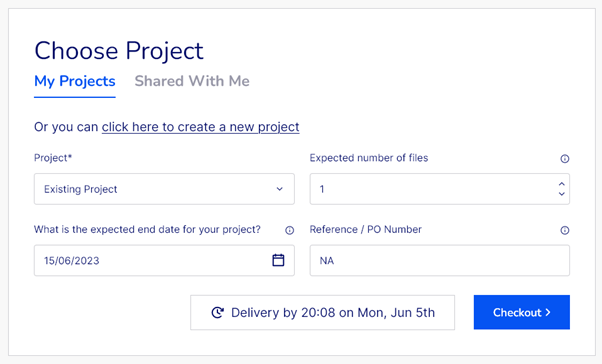
If you want to create a new project, choose 'click here to create a new project' and add your project details; project name, the number of files you expect to send us in total for the project, the date that you expect to send the last file for the project, and a job reference or PO number, if required, to show on your invoice.
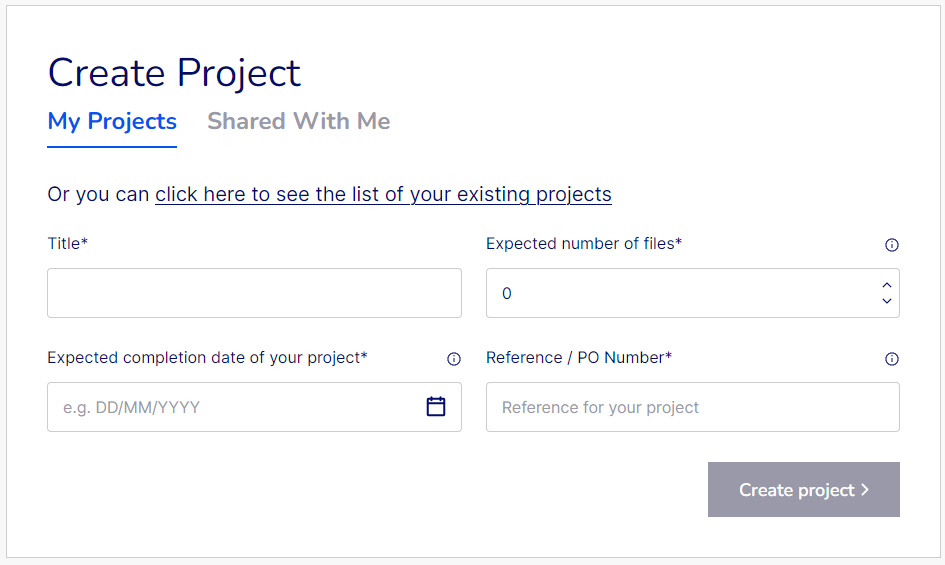
Once you've filled out all fields, the Create project button will become active. Click on this to create your project, and the button will change to 'Checkout'. Click this to complete your order.
Find out more about 'Duplicate project on completion' here.
6. That's it! You should see a confirmation that we've received your files on your screen, and you'll receive an email to confirm your order.