Simple steps on how to upload audio or video files to a shared transcription project.
If you have upload or full access to another user's project, you can upload into the project.
You can do it in two ways - either by clicking 'upload into project' from your Library, or going through the usual upload route and choosing 'Shared with me' and either Full access or Upload access, depending on what type of access you have.
1. Upload directly into project
Find the project under 'Shared with me - Upload access' or 'Shared with me - Full access' depending on what type of access you have.
You will see a menu icon on the right hand of each project. Click to open the menu, and you will see an option to 'Upload into project'.

2. From the file upload page
You can also upload files to a share project in the usual way. Click on Upload a file, upload your files and set your services. Click on 'Checkout' once all files are fully uploaded and you can see a price.
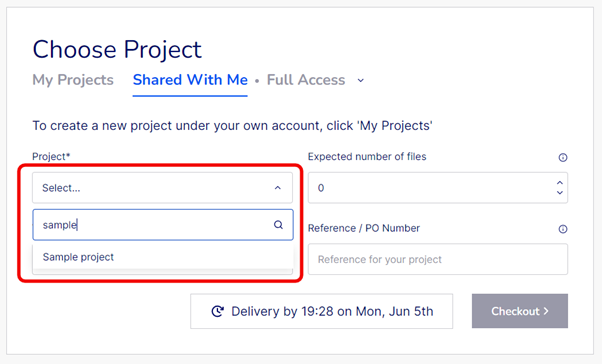
When you land on the Choose Project page, click on 'Shared with me' and either Full access or Upload access, depending on what type of access you have.
You should then see a list of projects which you have this type of access to, which you can search through if needed.

If you have access to projects from multiple different companies, you will first need to choose a company, and then choose from a list of that company's projects.
Once the project is selected, click Checkout to complete your order. Both you and the project owner will be notified.
.png?height=120&name=Verbit%20go%20logo%20(1).png)